Cosplay armor tutorial: The Mold
March 5, 2015
With ComicCon Indianapolis fast approaching, costumers are looking for ideas and projects to make their con experience all the better. Not everyone can afford the pricey props like chainmail and plate armor from metal scrap. Here are some ideas for a budget that will still look amazing.
I’m a competitive cosplayer with a limited budget, so when I look for supplies I’m usually crying to myself as I pass over all the ‘professional materials’. However, in my five years of constructing my own items, I’ve found that foam can replace metal, paper can cover blemishes and duct tape is my best friend. All the supplies in this tutorial I got at Hobby Lobby.
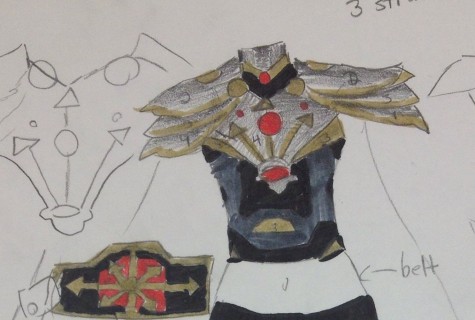
In this series of tutorials I’ll be going through a step-by-step process of how I make my chestplate armor for my new competitive cosplay.
Materials needed will be:
- Craft foam
You’ll want different variations of craft foam. The thicker foam will be used as the base plate for your armor and the thinner pieces will be used for details. You can get sheets of craft foam for a dollar at Hobby Lobby.
- Duct tape
As I said before, duct tape is my best friend. I have a saying that if the duct tape isn’t working, there isn’t enough duct tape. You’ll be using the tape to construct the shape for your chest plate.
- Old disposable shirt, preferably black if you want your armor dark.
This will be used early on as a protective covering
- Very thin board
It’s like cardboard, but very thin, and it isn’t easily flexible. It can be used as a cut-board and as finishing touches to armour detail.
- Box cutter, carving tools and sanders
You have to cut the foam with precision and these are the tools to do it.
- Hot glue gun
This is my second best friend. You want to make figures or cool swirly details? Hot glue works like a charm.
- Spray paint
Be careful which paints you choose, some can actually deteriorate foam.
- hole-punch pliers
You’ll use these to make eyelets for the back of your armour
- Plastic string
It’s stretchy and tieable without being breakable like regular string.
- Rulers
For precision and measurements
- Craft wire
It will be used to create base formations and shapes to fit foam or hot glue over.
- Lots of time, patience and confidence in yourself
It’s a long grueling process, but the outcome is worth it!
Step one
Alright, a warning in advance, step one is actually the hardest step since it is the first step. It’s not going to look good or neat, I’ve done it multiple times and it always looks bad, but keep it up and don’t give up.
First, you will need that duct tape, the shirt and a pair of scissors.
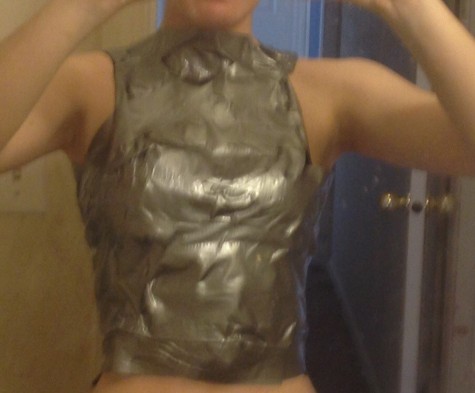
Put the shirt on and tighten it around your abdomen. Next, I’d start wrapping the duct tape around the shirt and abdomen. I always start from the bottom, and work my way up. If you are a girl, I’d start at the smallest part of your waist and work up from there. Don’t worry, the piece to cover the midriff will be made later.
It’s difficult once it gets right under the bust or middle of the rib cage, so a partner may be needed to help continue the tape. I usually end mine right over my bust.
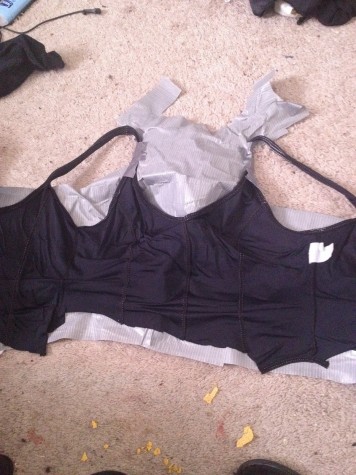
Next, either have someone or yourself, cut up the back of the duct tape and shirt. The shirt will allow the duct tape to come off painlessly and you will have a mold of your abdomen. From there, if you like how the mold looks, cut the excess shirt away from the tape edges.
After the mold is neat and trimmed, take the hole-punch and make several eyelets up the back and thread the plastic string through the holes. This will act as a corset backing so you can easily get the armour on and off.
Place the mold to the side and let it sit for a while while you start making plans for your actual armor designs.


